Replicating Changes
If everything has gone to plan you should now have all of the following pieces of the puzzle in place on your Linux system.
- A Workshop Client App that allows you to maintain various master files, and enter orders. The back end of this application is provided by...
- An OData and RESTful web services API implemented using Harmony Core, managing data in Synergy ISAM files, and with the Streaming Integration Platform I/O hooks in place.
- A RustFS S3 storage server containing both counted and parquet file snapshots of the application data set.
- A Redpanda server ready to receive CDC messages as application data changes, along with other necessary messages.
- A running instance of the SIP Configuration Server hosting configuration data and providing TLS security certificates.
- A running instance of the SIP Snapshot Agent, ready to process additional snapshots as necessary for the operation of the environment.
- A running instance of the SIP Message Broker, ready to create and post CDC messages to the Redpanda (Kafka) server as application data changes.
- A running instance of the SIP ISAM Agent maintaining a replica of the ISAM data to support read-only workloads or for DR purposes.
- A running instance of the SIP SQL Agent maintaining a replica of the application data in a SQL Server database.
- A running instance of the SIP JSON Agent transposing CDC messages into a JSON format to make them easy to consume from miscellaneous third-party tools or applications.
- An SMTP4DEV Email Server to receive any admin alerts sent out by agents.
- A DbGate Server that can be used to browse the content of the replica SQL database.
The application's data set currently consists of the following data:
| File | Description | Fields | Keys | Records |
|---|---|---|---|---|
| DAT:customer.ism | Customer master file | 19 | 8 | 1,500 |
| DAT:employee.ism | Employee master file | 18 | 4 | 413 |
| DAT:inventory.ism | Inventory master file | 14 | 6 | 3,500 |
| DAT:order.ism | Order file | 12 | 6 | 152,162 |
| DAT:orderline.ism | Order lines file | 9 | 3 | 1,219,136 |
| DAT:shipto.ism | Customer ship-to locations | 13 | 1 | 12,054 |
| DAT:user.ism | Users master file | 7 | 3 | 2 |
| DAT:vendor.ism | Vendor master file | 17 | 7 | 500 |
| DAT:warehouse.ism | Warehouse master file | 2 | 2 | 7 |
Prepare your environment
If you don't already have these applications open in a browser tab, click on the links to open them
Alter Data and Verify Replication
At this point all of the pieces are in place and the Streaming Integration Platform should be ready to do its job. Each time you use the main application to alter data, you should see a new CDC message writtem to the CDC topic.
Verify CDC Message Capture
- Log in to the the Workshop Client App using username admin and password p@ssw0rd.
- Click on the Customers option to view the Customer Account Browser.
- Pick any customer and click the Edit button at the end of the row.
- In the customer edit dialog, change something simple, like the Address.
- Click the Save Customer button.
You should see a message saying Customer X Updated.
Verify the CDC message
View the DEFAULT_CDC topic.
You should see a CDC message that looks something like this:
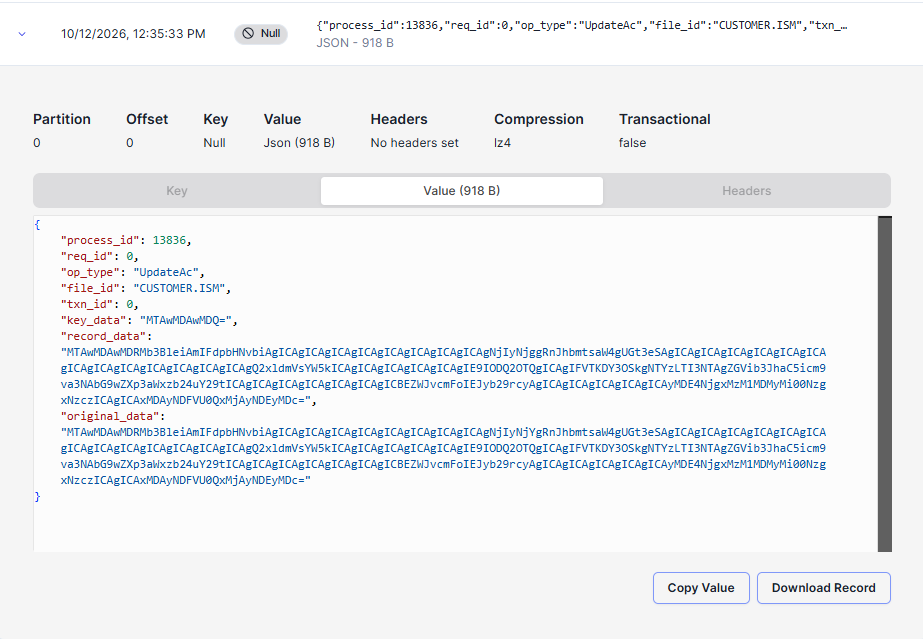
Notice that the message identifies the change as file_id CUSTOMER.ISM and type UpdateAc; this represents a WRITE (update) operation. The message also includes both the current state of the data in the record_data property and the state of the data before the update in the original_data properties.
The data in both records is base-64 encoded, to allow for any non-ASCII data that might be in the records. If you want to see the original data:
Decrypt and print the record data
Paste this command into your Linux terminal but DO NOT PRESS ENTER
base64 -d <<<
You should see the record data, something like this:
10000001Ortiz Corporation, Inc. 14163 Mill Dr Suite 916 Indianapolis IN20521 US(267) 399-2956 emily.hughes@ortizcorp.com Emily Hughes 10070997290391-1909916 100015USD120050513
Verify the JSON Agent Processed the Change
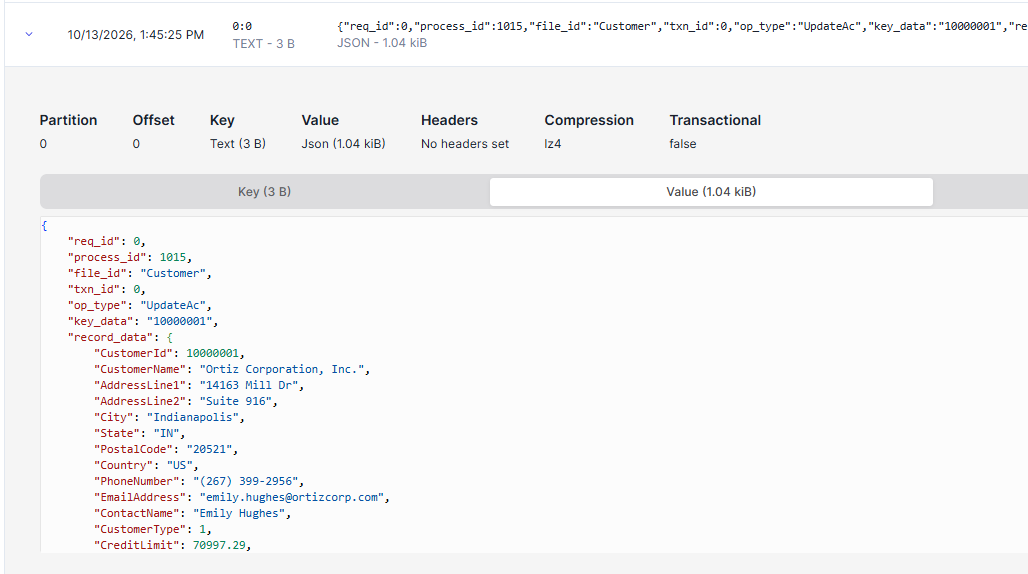
As soon as the message was posted to the DEFAULT_CDC topic, the JSON Agent should have consumed the original message, transposed the data in the record properties to JSON objects, and posted the message to the DEFAULT_CDC_JSON topic.
Verify JSON Message
View the DEFAULT_CDC_JSON topic.
You should see that the data in the JSON message matches the data in the record that you unencoded above.
Verify JSON Agent Activity
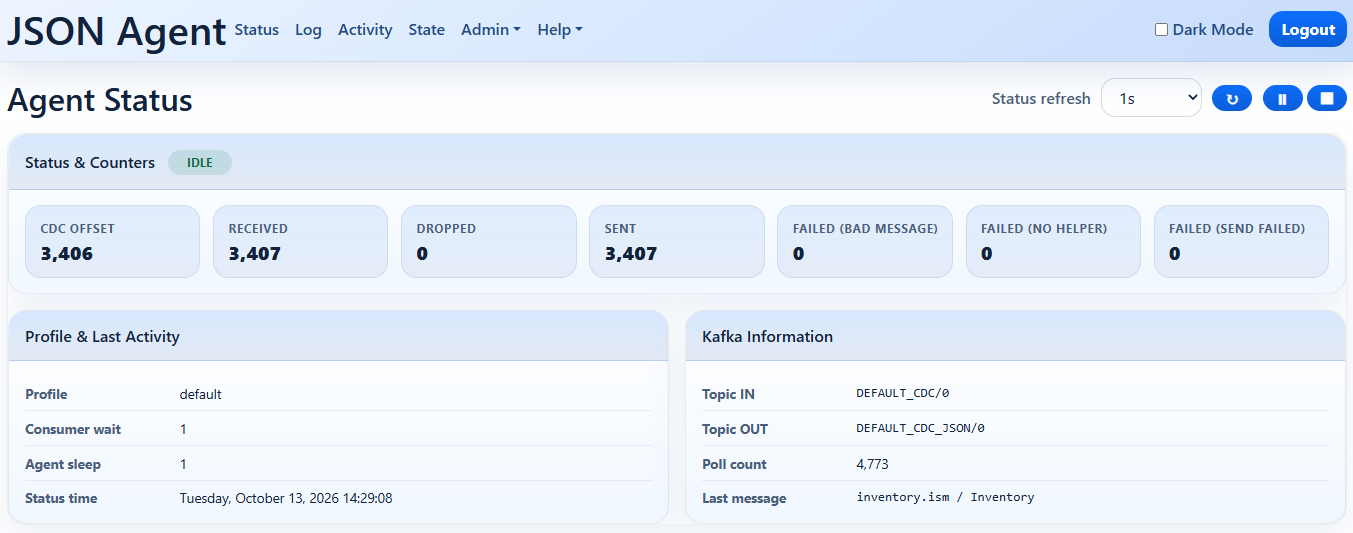
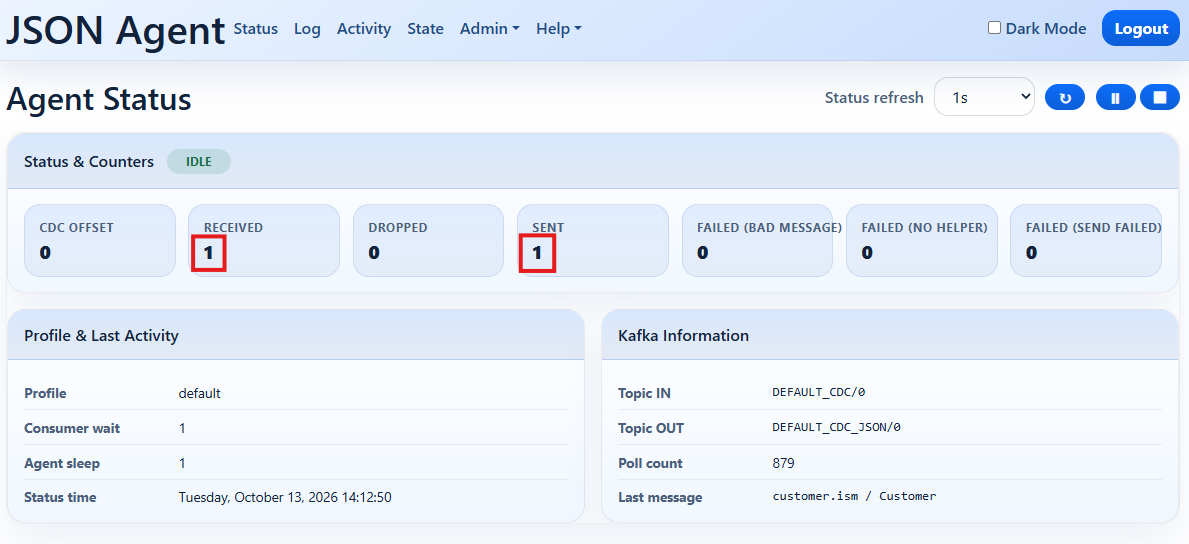
View the JSON Agent Console Status page.
You should see that on Status page now indicates that one message has been received, and one sent.
Verify the ISAM Agent Processed the Change
At the same time as the message was processed by the JSON Agent, it should also have been processed by the ISAM agent.
Verify ISAM Agent Activity
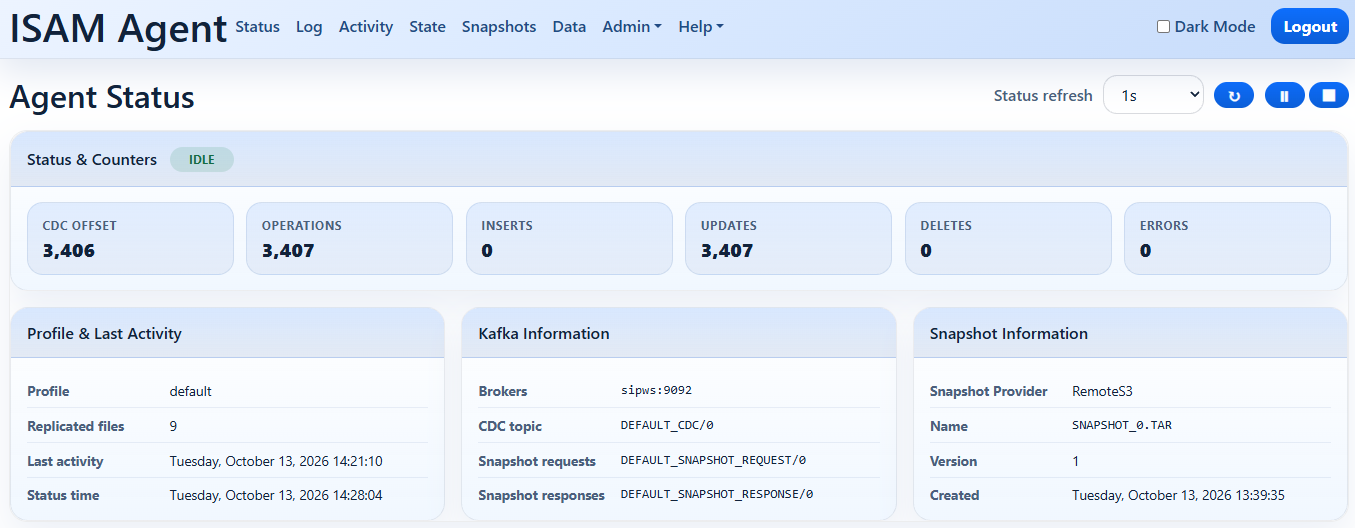
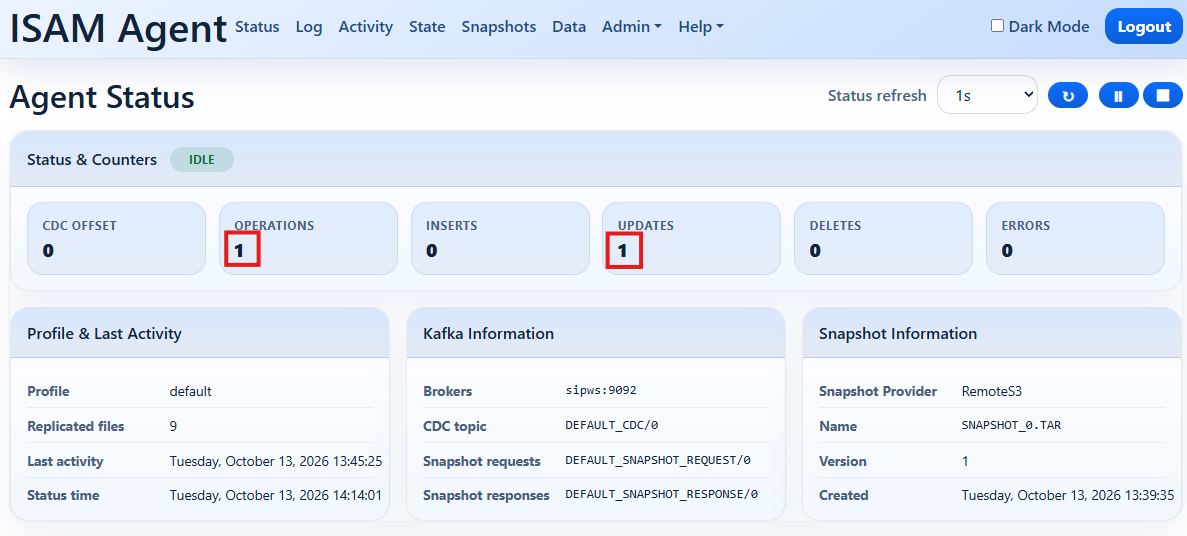
View the ISAM Agent Console Status page.
You should see that on Status page now indicates that one operation has been completed, and one update, because the change you made was to update a record.
Verify the SQL Agent Processed the Change
At the same time as the message was processed by the other agents, it should also have been processed by the SQL agent.
Verify SQL Agent Activity
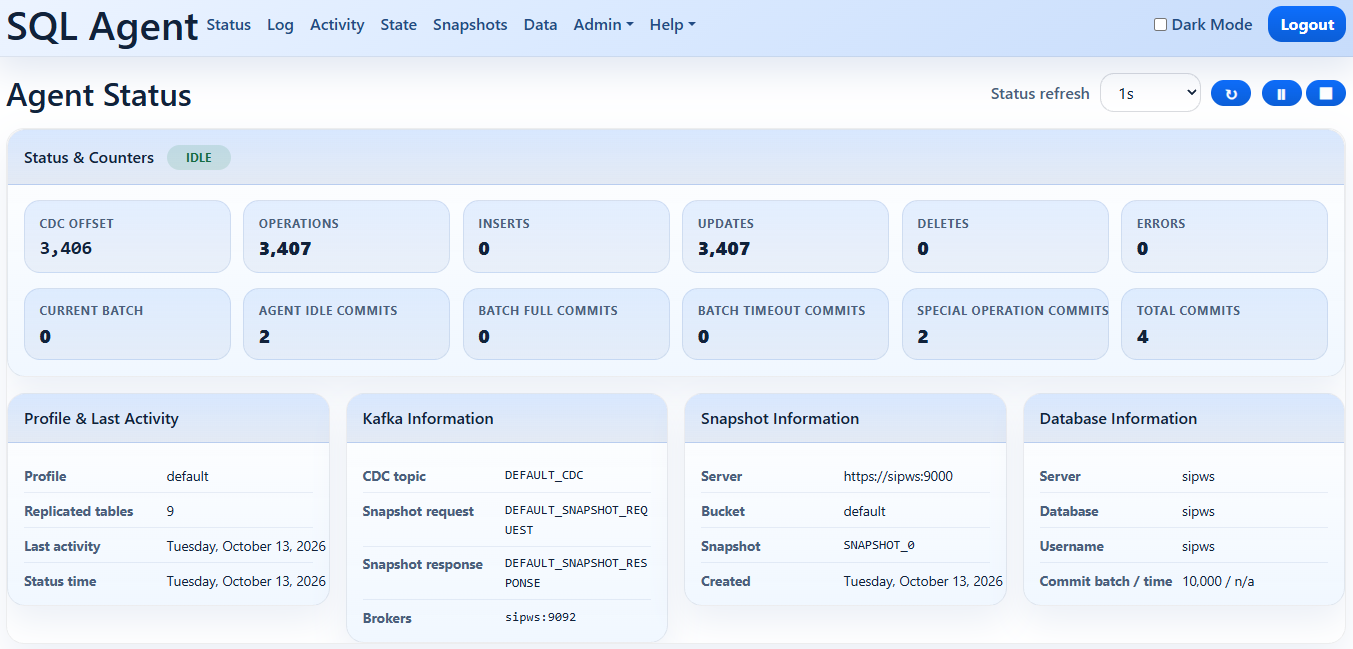
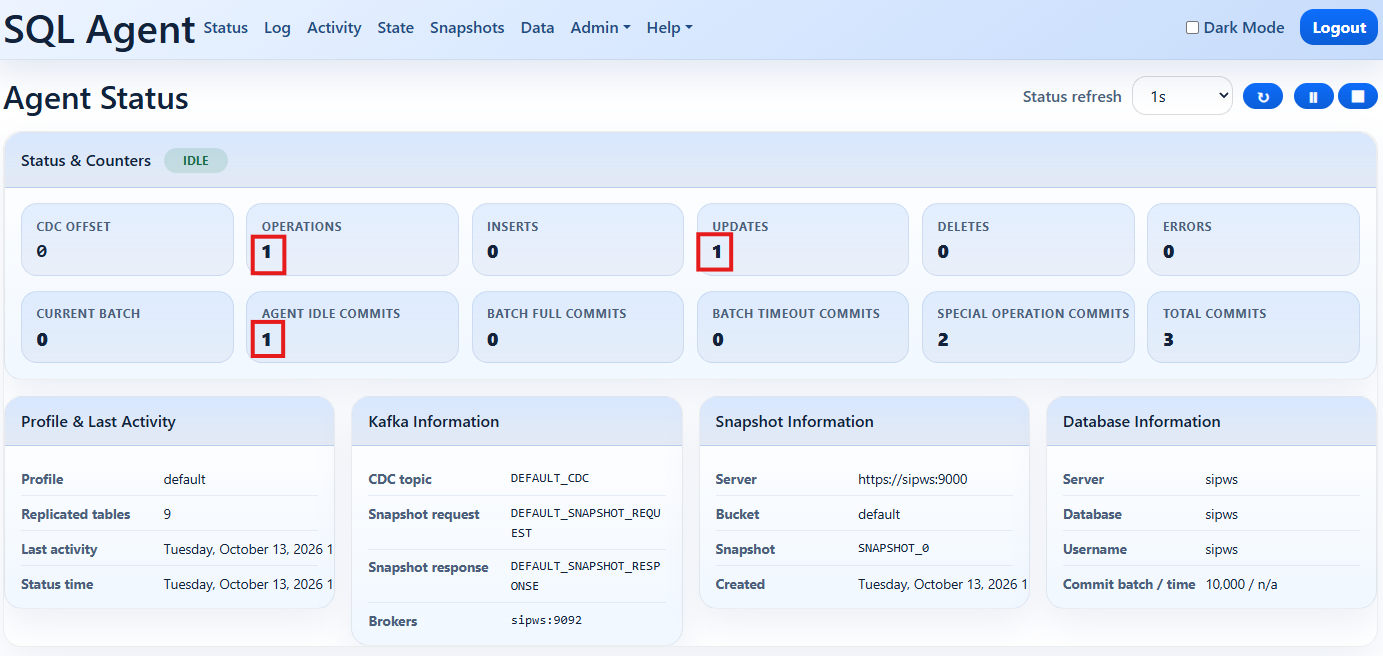
View the SQL Agent Console Status page.
You should see that on Status page now indicates that one operation has been completed, and one update, because the change you made was to update a record.
Make more changes
Feel free to use the client app to make more changes to the data, then verify the activity in the various agents.
Replicate Bulk Changes
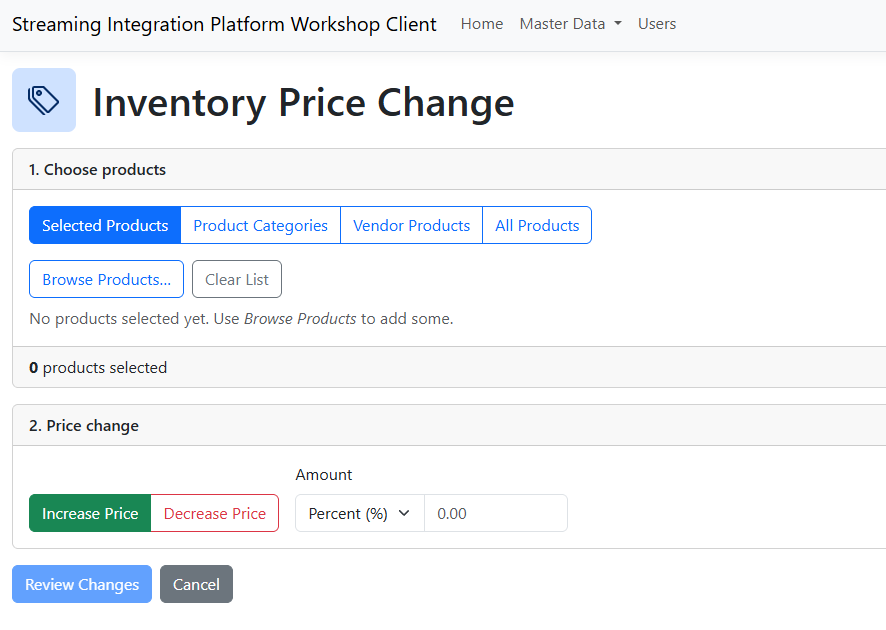
The best way to really exercise the Streaming Integration Platform is to cause a lot of data changes to occur in a short period of time, so to provide this type of functionality in the Workshop, the Client Application has an Inventory Price Change feature that allows you to select a collection of inventory items, ultimately all inventory items, and apply a selling price change to all of the selected items.
Access Inventory Price Change
- Open the Client Application and log in using username admin and password p@ssw0rd.
- Click the Inventory Price Change option.
You will see a form like this:
Specify the price change data
- Click All Products.
- With Increase Price selected and in Percent mode, enter 5 in the amount field.
- Click the Review Changes button.
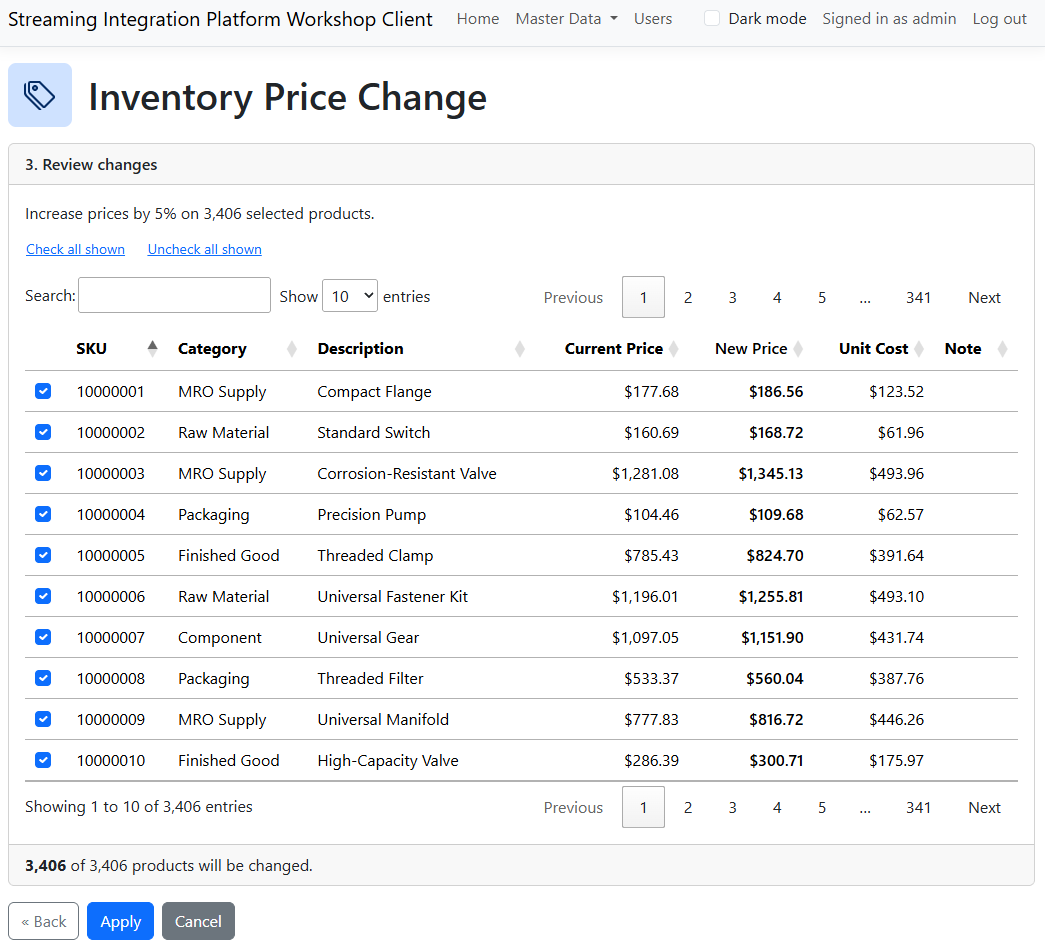
You will see a browseable list of the products whose prices will change. Depending on the changes you may have made to the data in the previous step, the change set should contain somewhere in the region of 3,400 chnages.
Make the change
- Click the Apply button.
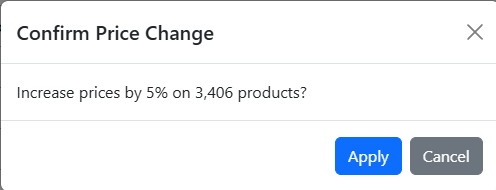
You will see a confirmation dialog.
Confirm the change
- Click the second Apply button.
You should see a temporary message as the change request is sent to the REST API endpoint.
Verify the activity in Redpanda
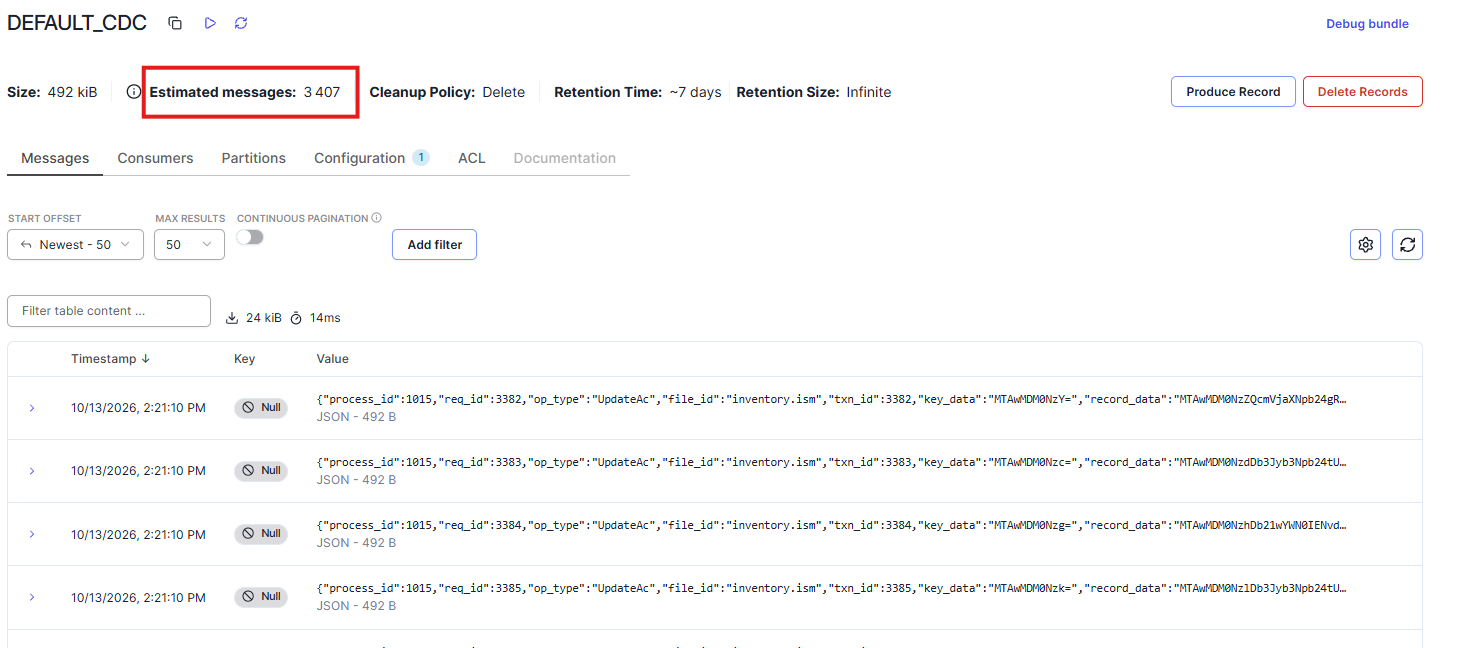
View the DEFAULT_CDC topic. If necessary, refresh the page.
You should see a large number of CDC messages, corresponding to each of the products that had a selling price change.
Verify agent activity
Check each of the Agent consoles,
You should see that each of the agents has processed the change set that you submitted. All three agents should be at the same offset in the CDC topic, having processed the exact same messages.